In the Security Cockpit, you get a cross-customer, interactive overview of all measures and the most important related metrics. You can display the affected customers, goals, and vulnerabilities for each measure. You’ll also find detailed information and solutions for implementing each measure, plus the option to plan them using a cross-customer renovation plan.
With the Security Cockpit, you can see at a glance where the most urgent need for action is and which steps will have the biggest impact on improving your IT security. Using the renovation plan, you can plan the most urgent measures directly in the Security Cockpit.
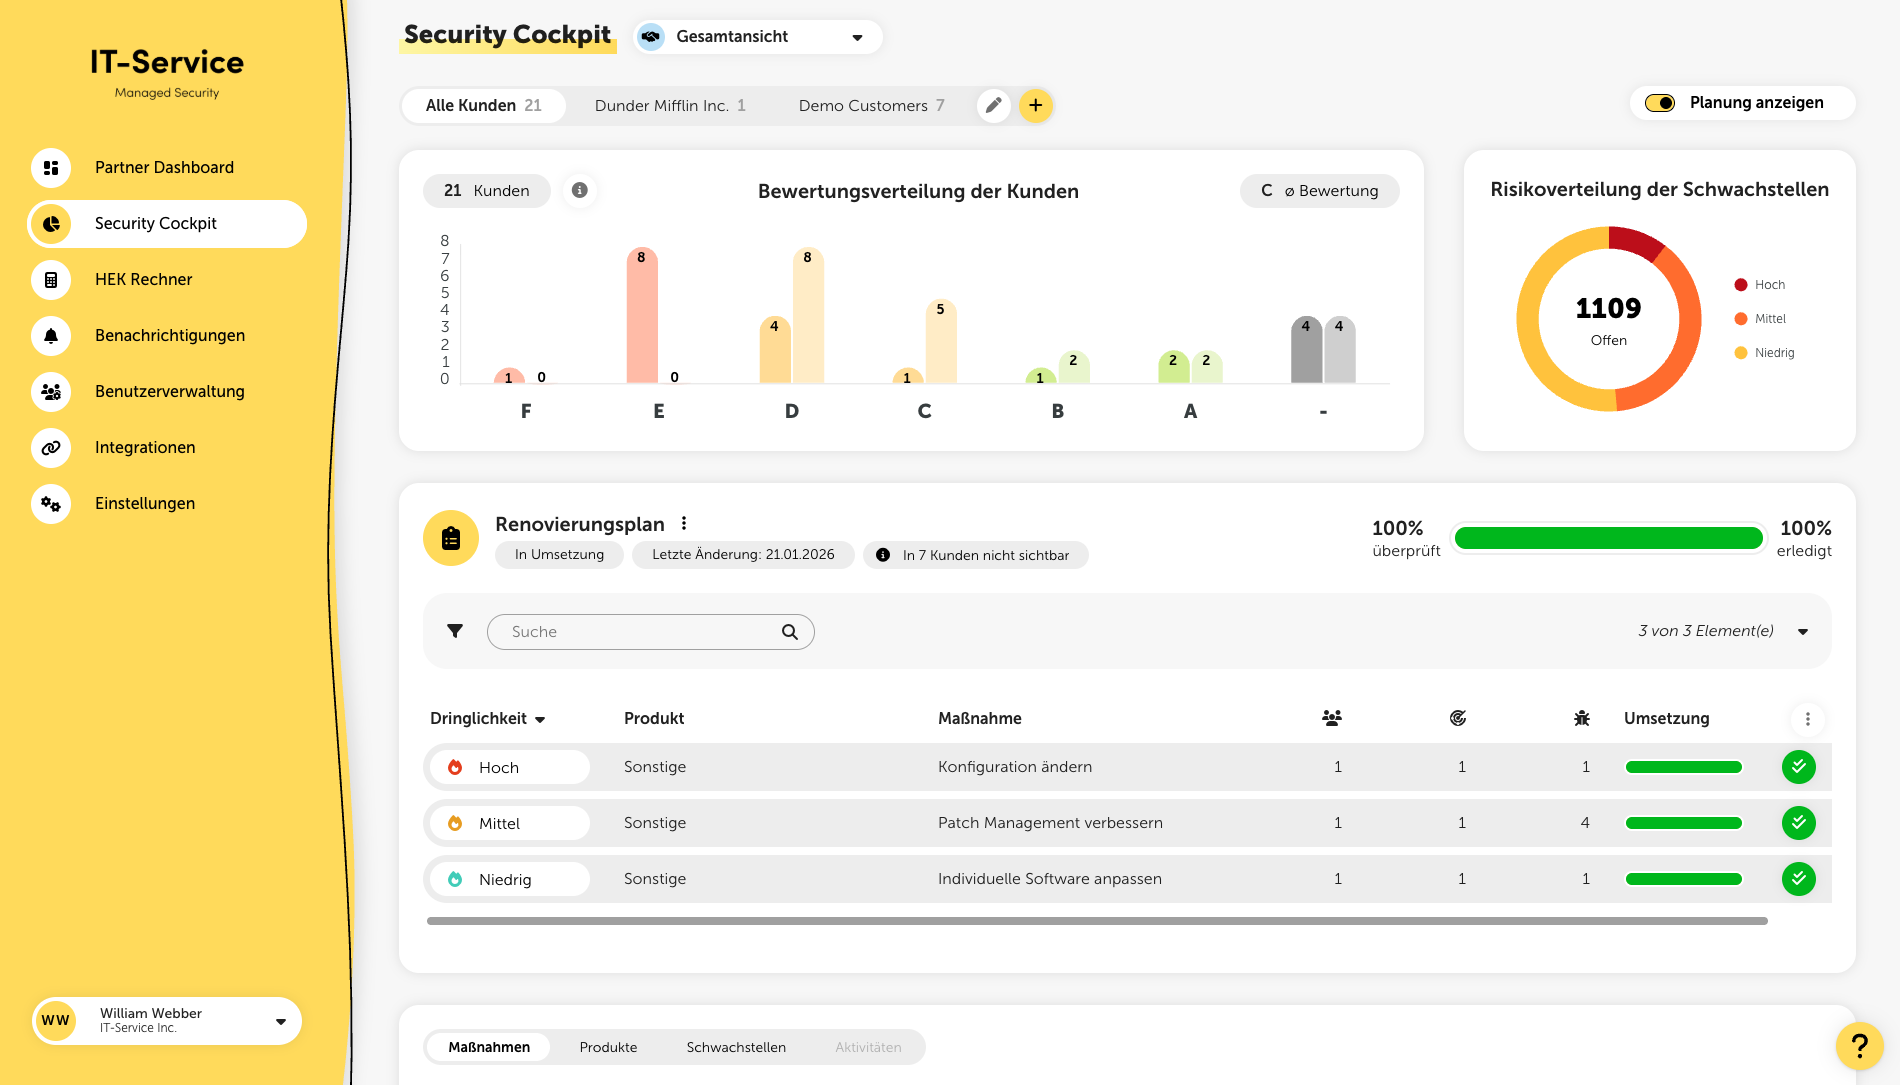
At the very top of the page, you can choose between the overall view and the display of your Managed Services. The selected setting is kept in the browser you’re using across the whole platform and applies to relevant metrics such as the security rating or detected vulnerabilities.
If you switch into a customer and the Managed Services (or Unmanaged Services) view is active, a corresponding indicator is shown next to the customer name.
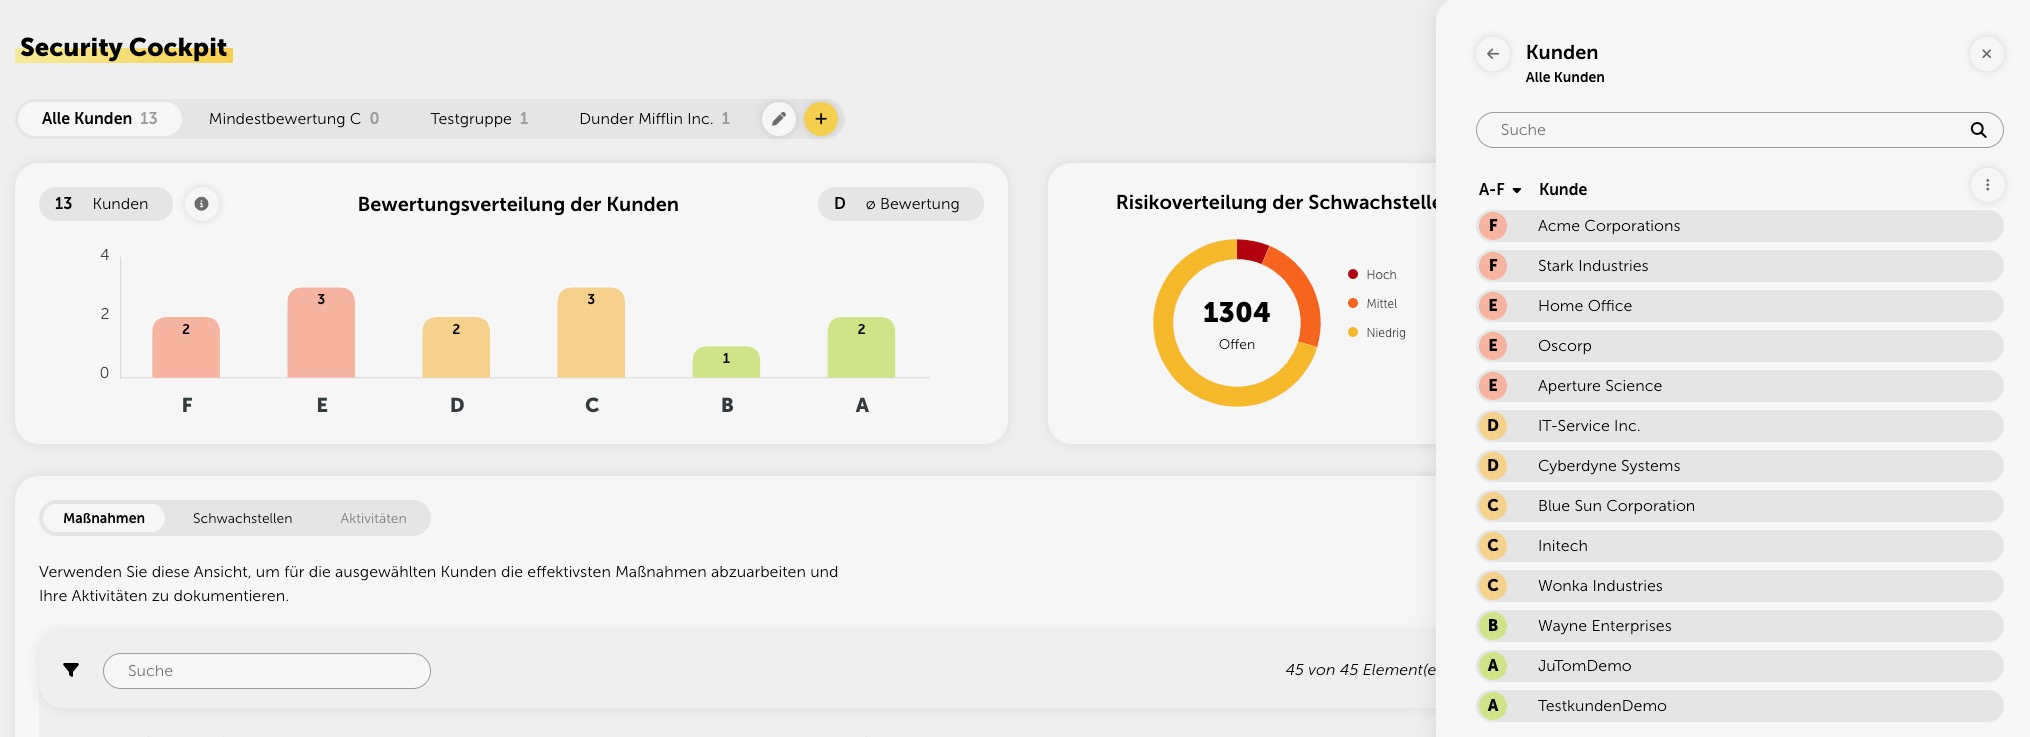
At the top of the page you can create and manage customer groups. Customer groups give you the option to filter all content in the Security Cockpit for one or more desired customers. The customer groups you create can be adjusted or deleted at any time, and the order can also be changed using drag & drop in the edit menu. When you change the groups, no data is lost, since this is only a filter function.

Below the customer group selection you’ll find graphical representations of your customers’ rating distribution, as well as the risk distribution of the existing vulnerabilities.
In the Security Cockpit you can directly plan actions across all customers. With the help of the renovation plan you can view and manage the planned actions and their implementation status. You can also create multiple renovation plans and assign them to different customers. If you assign a renovation plan created here to one or more customers, it will then be shown in the “Renovation plan” menu in the respective customer view.
You can add measures either individually via the measures table or using the “Quick planning” function. If you want to edit the renovation plan (e.g., rename the plan), click on the three-dot menu and select the appropriate option. To remove measures from the currently selected renovation plan, select the “Start planning” option. By clicking the minus button at the end of each row you can remove measures again.

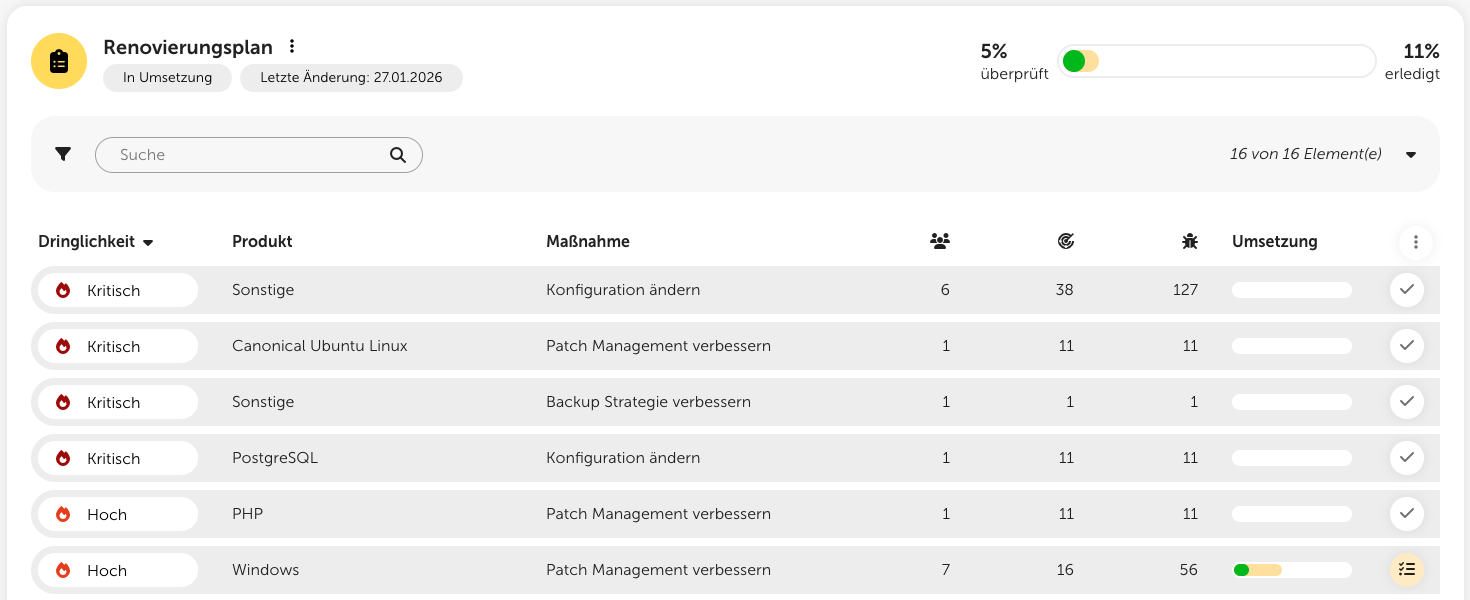
You can manually mark already implemented measures in the renovation plan as “done” at any time. To do this, click the button with the checkmark. Measures that are detected as done by one of our checks are automatically displayed with a green double checkmark.
The table with the measure recommendations, together with the renovation plan, is the central feature of the Security Cockpit. Here you’ll find a list of all measures for your customers, sorted by urgency. The urgency is calculated from the sum of all risk values.
With one click on the name of the measure, the detail view opens, where you get a detailed description of the measure as well as a step-by-step guide with helpful links for implementation.
In addition, the table shows for each measure how many customers and targets are affected and how many weak points are addressed by the measure. With a click on the corresponding key figure, detailed breakdowns are also displayed.
With one click on the plus button at the end of each row, you can add measures to the currently selected renovation plan. Please remember to save the renovation plan with a click on the corresponding button after adding measures.

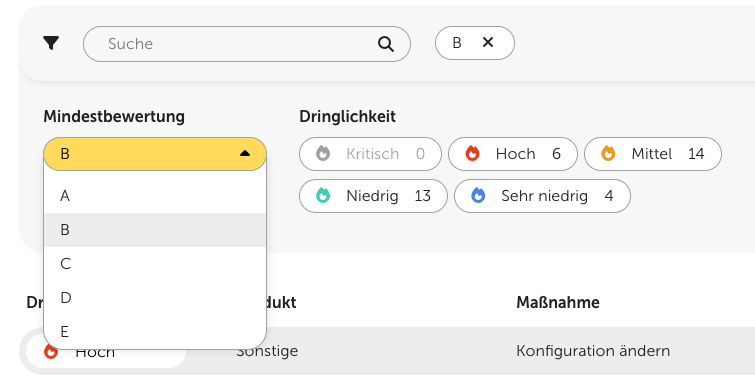
At the top of the measures table you’ll also find the “quick planning” feature. With it, you can have measures automatically planned so that after implementing them you reach a certain assessment level.
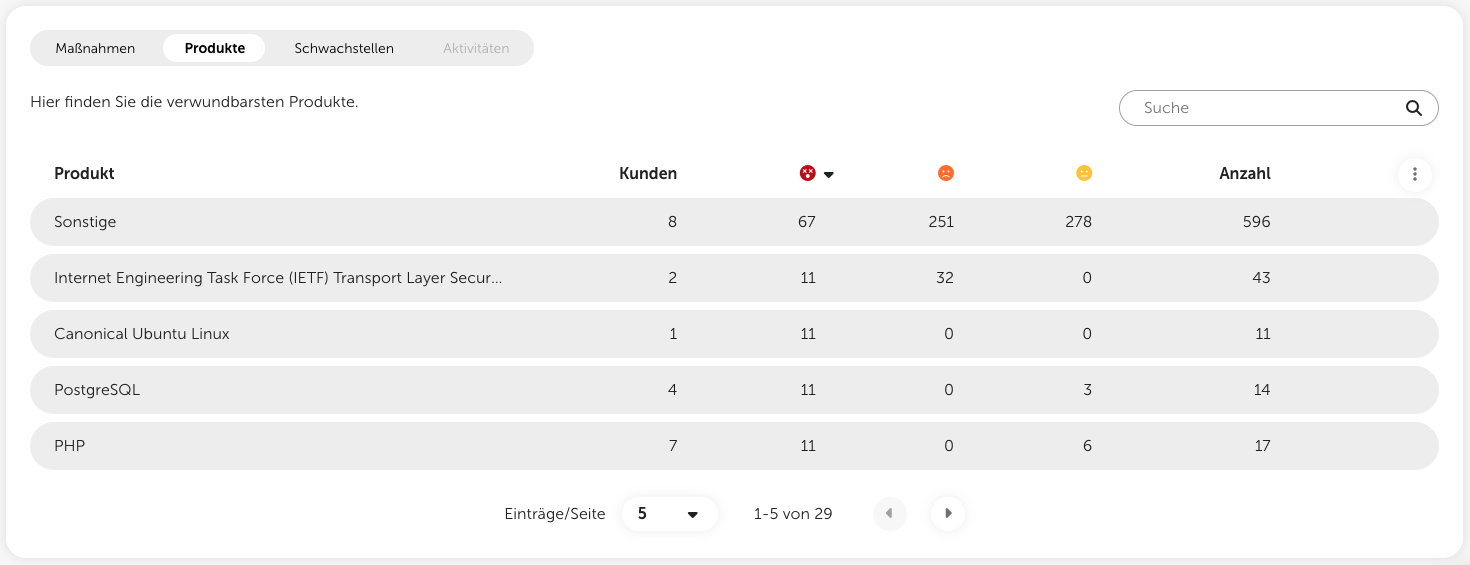
With one click on the “Products” tab above the table, you’ll get to a list of the most vulnerable products within the selected customer group. Here too, you can click on the metrics in a row to open the detail view and get more information.
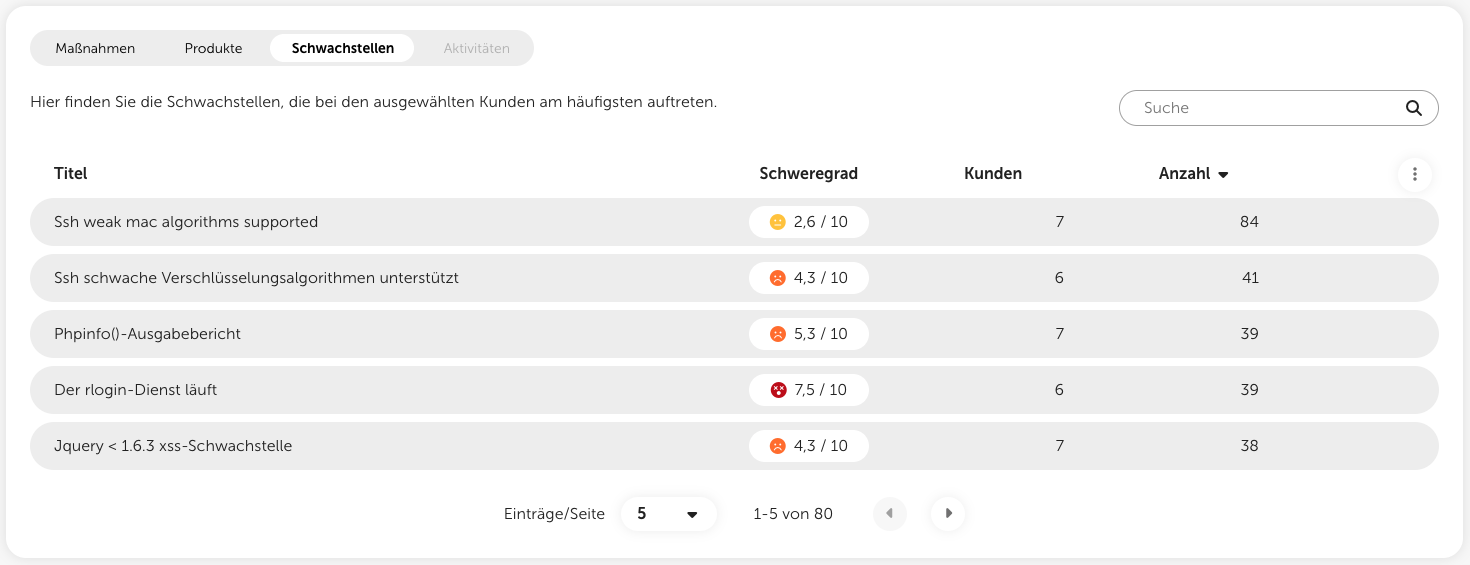
With one click on the “Vulnerabilities” tab, you’ll get to a list of the most common vulnerabilities within the selected customer group. Here too, you can click on the metrics in a row to open the detail view and get more information.