To be able to perform internal network checks, you first need to configure a special gateway VM. You can also set up multiple gateway VMs for different network segments. This way you can precisely control which networks are checked by which gateway.
To set up a gateway, go to the infrastructure page of the internal network targets by clicking the “Configuration” button at the top right to open the configuration page. In the “Gateways” section you’ll find the necessary steps, which are described in more detail below.
Preparation
Before you set up the network check, make sure that network devices are present in your target overview. You can either have devices detected automatically using Asset Discovery or add them manually.
Then click the yellow plus button to create a gateway.
Step 1: Configure network settings
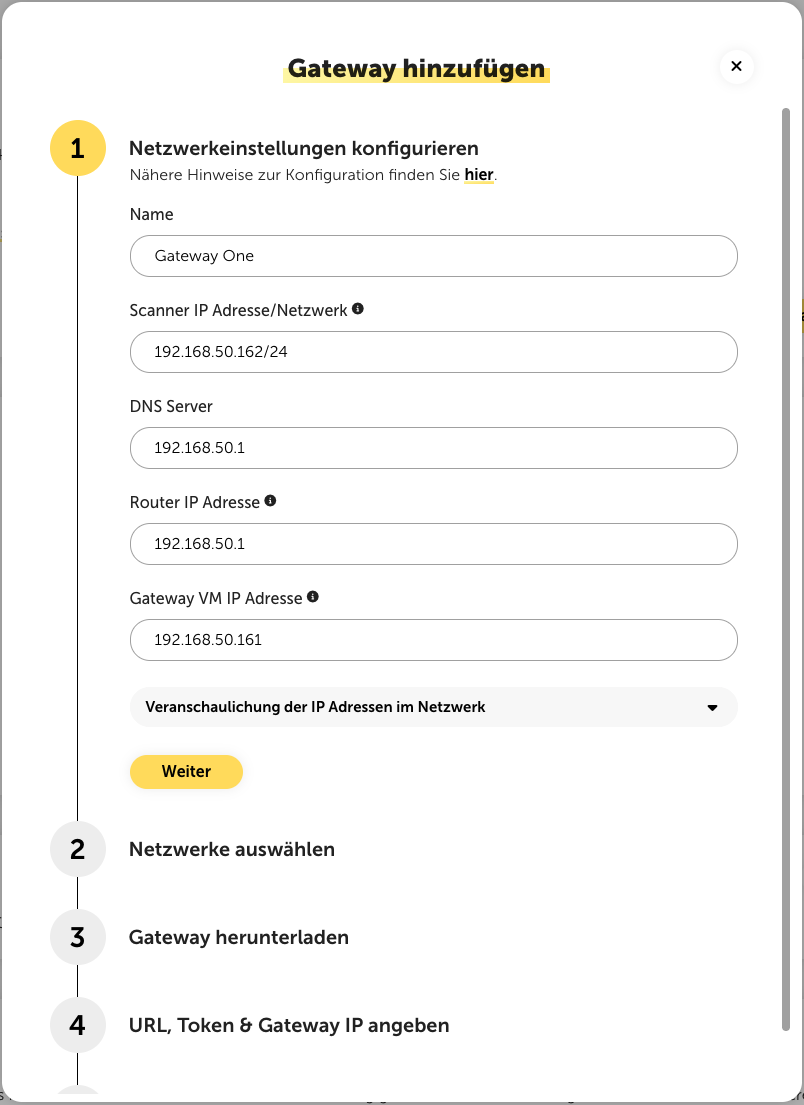
A setup wizard for adding a gateway appears. In the first step, you configure the gateway name and the necessary network settings:
The IP address of the scanner must be a free IP address in the subnet of the gateway VM. Enter the IP address with the subnet prefix. The network check is then performed via this scanner IP.
The IP addresses of the DNS server and the router IP address are also entered here. Depending on the network configuration, these IPs can be the same or different.
In addition, the IP address of the gateway VM has to be specified. This absolutely has to be different from the scanner IP! The gateway VM IP address also has to be configured directly in the gateway in the next steps.
After entering the IP addresses, click “Weiter” to move on to the next step.

Step 2: Select networks
In the second step, you define which networks should be checked by this gateway. You can either select networks via the dropdown menu that were found through Asset Discovery or manually add new networks. By clicking “Next” you go to the next step.
Step 3: Download gateway
After a gateway has been registered for you, you can choose the desired format with one click on the yellow download button and download the VM. You can choose between the formats OVA, VHD and ZST. You can configure the VM with any virtualization platform that is compatible with one of these file formats. We recommend using VMware (OVA), Hyper-V (VHD) or Proxmox (ZST).
You can also download the gateway images directly via the following links:
Step 4: Specify URL, token & gateway IP
The further configuration is done directly in the VM. For this, it first has to be set up and connected to the network:
Gateway VM installation
The VM is provided as a VMware (OVA), Hyper-V (VHD) and Proxmox (ZST) compatible image and can simply be imported. The minimum resource requirements are:
CPU: 2 cores
RAM: 2 GB
Disk: 8 GB
Gateway VM network configuration
After starting the gateway VM, you can log in with the following user data:
gateway login: admin
Password: admin
It’s recommended to configure the VM statically. To do this, proceed as follows:
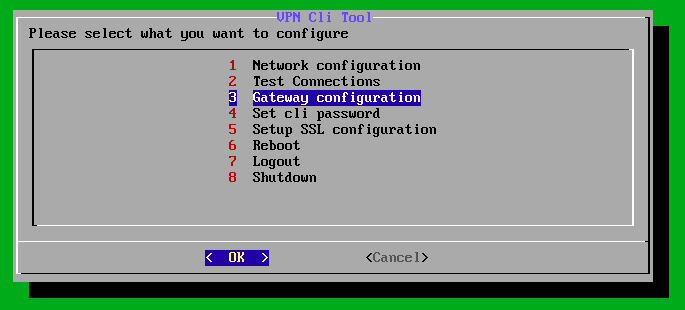
Go to the first menu item “Network Configuration”.
Go to the second menu item “Manual Configuration”.
Configure the following fields:
(Free) IP address
Netmask
DNS (IP address of your DNS server)
DNS name (your domain)
Gateway (IP address of your router)
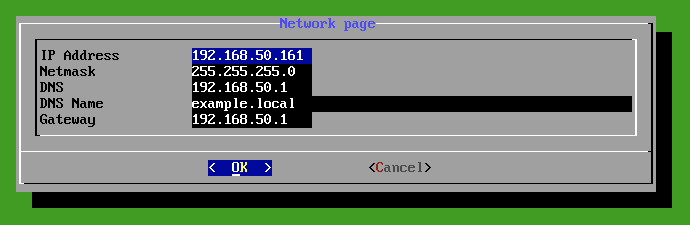
Confirm the configuration with “OK”.

If you don’t want to configure your VM statically, you can enable DHCP in the first menu item “Network Configuration” and then continue with the gateway configuration.
Register gateway VM
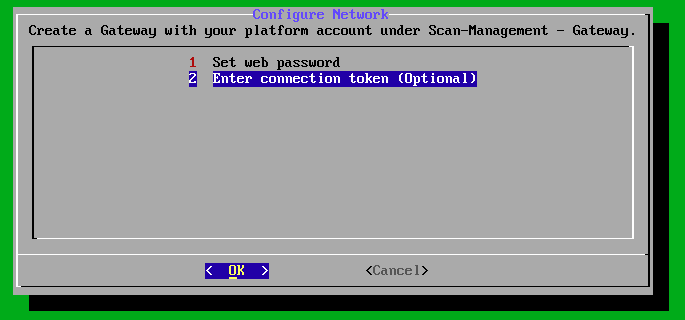
Go to the third menu item “Gateway Configuration”.
Then go to the second menu item “Enter connection token (Optional)”.
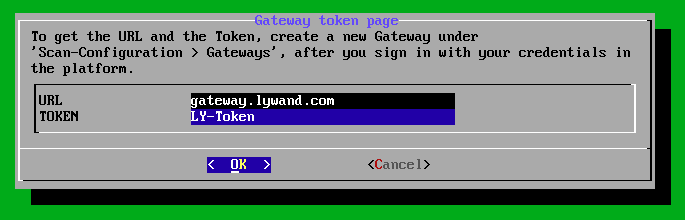
Enter the URL and token shown to you in the lywand platform here and confirm with “OK”.

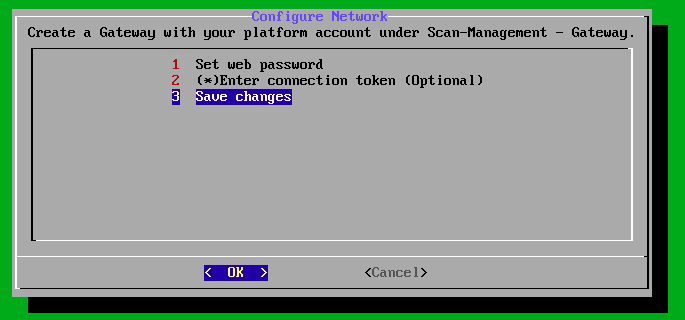
Then switch to the third menu item “Save changes” and confirm with “OK”.
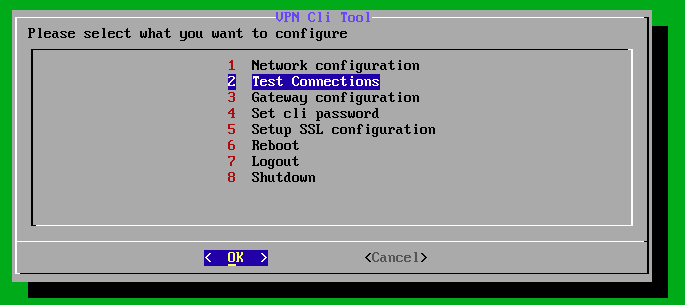
To test the general connection to the gateway, you can then use the second menu item “Test Connections”.
Step 5: Perform network permissions
In the last step, you need to make sure that the necessary network permissions are allowed on your firewall.
Both the scanner IP address and the gateway IP address must be able to fully reach the target devices in the internal network. All ports of these devices must be reachable.
In addition, the gateway IP address and the scanner IP address must be able to reach the following external addresses:
443/tcp outgoing to 45.135.106.140
443/tcp outgoing to https://gateway.lywand.com (217.72.202.36)
443/tcp outgoing to https://gpublic.azurecr.io (update service)
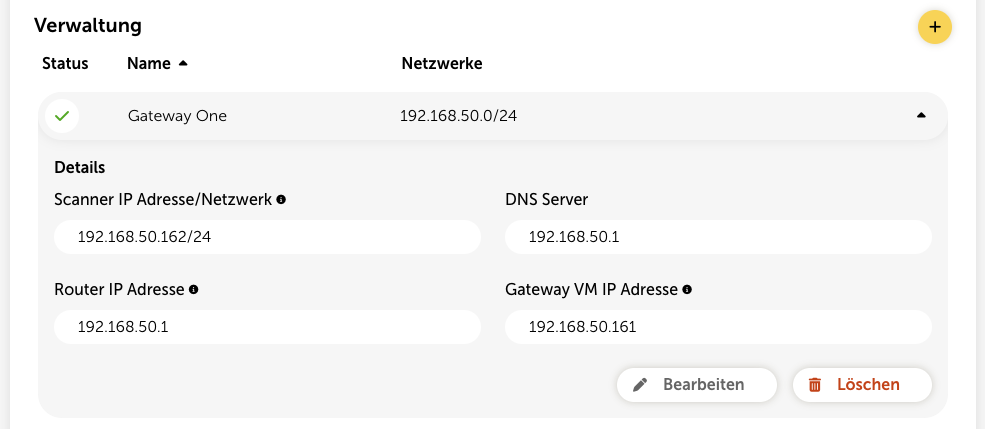
Click “Done” to finish the setup. As soon as the gateway is connected, the status on the configuration page will be updated accordingly:

If you want to change the name of a gateway or the network ranges to be checked, you can do this via the “Edit” button. Please note, however, that the IP addresses configured in the first step can no longer be changed afterwards.
In this view, gateways can also be deleted again. You can use the yellow plus button to add more gateways that can be configured for other network ranges.