On this page, you’ll get an overview of all devices connected to the internal network of the selected customer. This doesn’t just include systems with the lywand Agent installed, but also assets like printers, smartphones, or IoT devices. From here, you can also start vulnerability checks for your network devices.
You can either add devices manually or let them be found automatically via Asset Discovery. This helps you get a better overview of your assets and can show you possible security risks – keyword "Shadow IT". The Asset Discovery function can be set up on the agents’ configuration page.
Here you'll find a table listing all devices connected to a customer's internal network. The table shows the following information about a target:
Switch to add found devices to the scope of internal scans
Device type (you can change the icon by clicking)
Device name (you can change the name by clicking)
IP address
Open ports
MAC address
Hostname
Network address
Indicator if the lywand Agent is installed
Managed Services status
Asset Value
Indicator for how the device was detected (e.g. via Asset Discovery or installed Agent)
Date when the device was first seen
Date when the device was last seen
Date when the device was last checked

Targets can either be added manually or found using Asset Discovery. Asset Discovery scans are performed via the agents, and assets found this way are automatically shown here in the target overview. If you want to remove found assets from the overview, for example, because they don't exist anymore, you can do so after selecting the assets you want using the dropdown menu in the table header or with the 3-dot menu at the end of a column.
In the target overview, you can also set the asset value of a target and define it as "managed" or "unmanaged". The managed services status affects the view in the Managed Services view. The Asset Value determines the weight of the target in the customer's risk assessment.
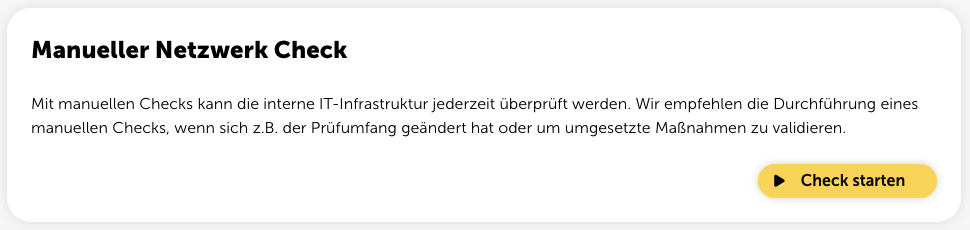
Devices on the internal network can be checked for vulnerabilities using the network check. This security scan works through a special gateway that needs to be configured first.
We provide this gateway as a virtual machine (VM), and it should be placed in the internal network. It sets up a connection to a scan cluster that takes care of running the network check. The scan cluster used here (Greenbone Cloud Services) comes from Greenbone AG, one of the world's leading providers for open source vulnerability management.
To run internal network checks, you need to set up a matching gateway first. Just click the “Configuration” button in the top right to open the configuration page. In the “Gateways” section, you'll see all the steps you need.
🛠️ Gateway Setup
Information about setting up the Gateway VM
If you run into connection issues or have problems running an internal network check after you've set up the gateway, check out our Network Check Troubleshooting Guide.
⚠️ Network Check Troubleshooting
Info on common errors and known pitfalls
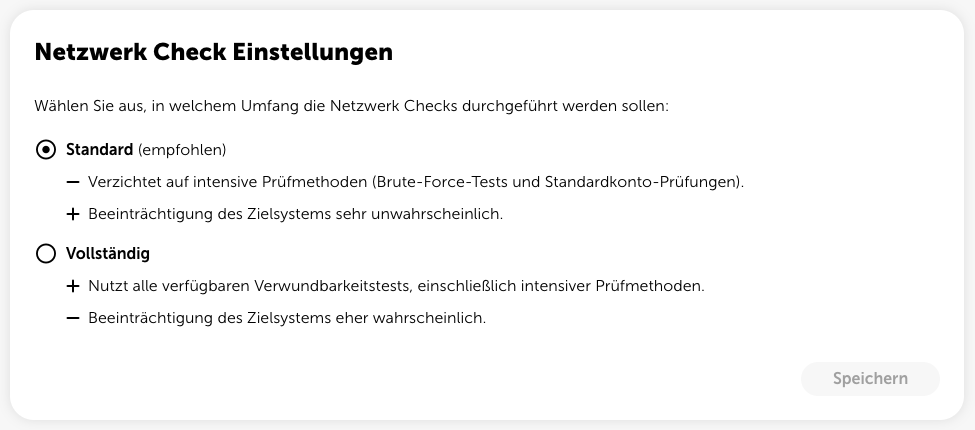
Here you can choose how much of the test method you want to run. With the “Full” option, you might find more vulnerabilities. However, we recommend keeping the default setting because running the full test might impact the target system.
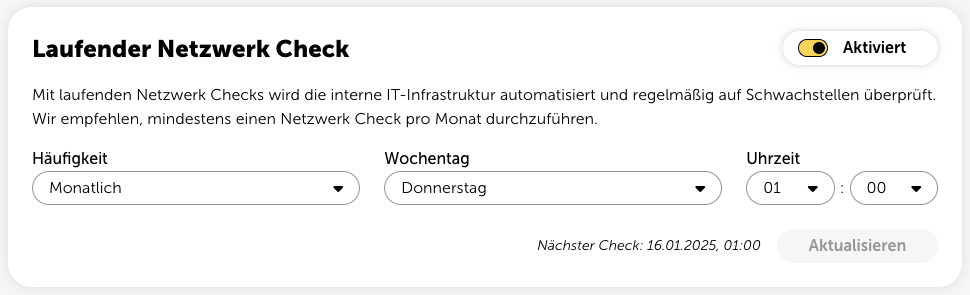
You can also enable ongoing network checks to have your internal IT infrastructure automatically and regularly checked for vulnerabilities.
Once you’ve finished configuring the gateway, you can start an internal network check at any time and have your internal network devices within the test area checked.